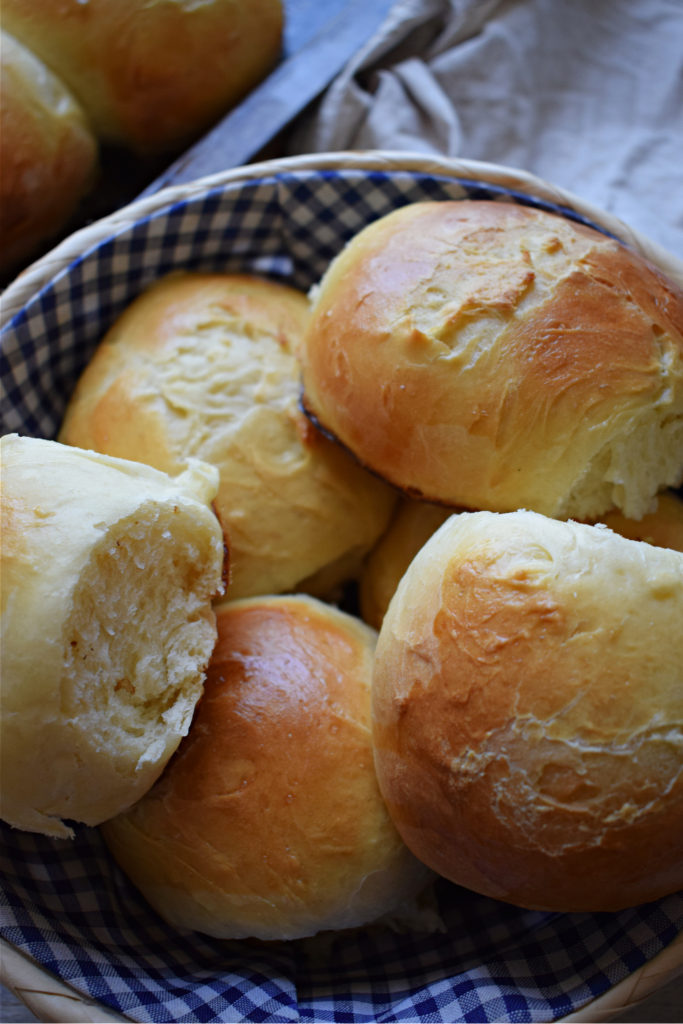
These Homemade Hawaiian Dinner Rolls are honestly so perfectly sweet, light and fluffy! You’re going to want to file them in favourites for all your upcoming summer barbecues, potlucks and eating! Move over supermarket bakery, we’re making our own rolls!

These are your perfect summer dinner rolls and they would go fantastic with the Creamy Cucumber Salad with Sour Cream and Mayo! Keep reading to get these Hawaiian rolls on your patio table this summer.

Admittedly, this is not my recipe. And when something is this great, you don’t mess with it. I found this recipe on Handle the Heat last week.
I was in search of Hawaiian Dinner Rolls as I’d never made them before. In fact, I’d only ever eaten them a few times and wasn’t really sure where they even got their name from. Why Hawaiian?

Let’s Look at the Rolls
Well, I quickly figured it out when I noted that pineapple juice went in the recipe. What? But they don’t taste anything like pineapples (thankfully), but just slightly sweet and delicious.
And if you saw Friday’s post for the Oven Roasted Rotisserie Style Chicken, you’re probably starting to see how we used that chicken. Remember I said that was recipe number in a three part series with the reveal coming this Wednesday..haha!
So, now you know we’re using these rolls in the final recipe. You’ll have to make sure you come back on Wednesday to see how it all came together. It’s worth it, I promise!
And for now, let’s take a look and see how you can make them at home as well!

What We Need To Make The Homemade Hawaiian Dinner Rolls
Like most bread recipes, you don’t need a whole lot of stuff. However, with this recipe being slightly sweet, we’re using pineapple juice and even a little sugar.
I cut the sugar a little from the original recipe as I thought they would be more than sweet enough with the pineapple juice. You’ll see the full recipe at the bottom.

Types of Yeast
For this recipe I used Instant Yeast, but you can use whatever kind you have at home. If you’re unsure of what kind you have or how to use it, here’s a little guide to three of the most popular types of yeast.
- Fresh Yeast – This comes in block form and needs to be kept in your fridge. Because it’s fresh yeast it will only last a few weeks after purchase. To use it, you dissolve it in warm water.
- Active Dry Yeast – This yeast is in dry form and you have to dissolve it in warm water before using.
- Instant Yeast – This is the easiest yeast to use. It comes in dry form and you simply add it to the the dry ingredients. Easy.
Hope this helps you decided what kind of yeast you have and how to use it.


Forming the dough
For this recipe, you add about half of the flour mixture to the wet ingredients until it forms a batter like consistency. The best way to do this is to use a wooden spoon. Then gradually start adding the rest of flour until you have a sticky dough.
Turn the dough out onto a lightly floured surface and start kneading. Knead it until it’s soft and springs back when you push it. This will take about 5 – 8 minutes. You will have a soft and smooth dough ball like shown here.
Now you cover it and leave it to rise. Rise time varies, but will take between 1 – 2 hours. Once it’s doubled in size, it’s ready.


Risen dough and Cutting the Dough
Now that you have your risen dough, punch it down and knock it around a bit. Place it on a clean and lightly floured surface and cut it into 15 equal parts.


Shape the Rolls and Let Them Rise Again
Roll each piece of dough into a round ball, like shown here. Place them all equally apart on a greased 9 x 13 inch baking tray. Cover them with a clean tea towel and leave them to rise for another hour.
Once they have doubled in size, they are ready to bake
Lightly brush the tops with a beaten egg. Bake in a preheated 375 degrees F/190 C oven for 15 – 18 minutes.


Fresh From the Oven
The rolls will continue to rise as they bake. They will be golden brown like shown here when ready.
These are absolutely delicious straight from the oven or at room temperature. They just easily pull apart. If desired you can brush the tops with butter when they come out of the oven to make them even softer.

How to Serve the Homemade Hawaiian Dinner Rolls
So many ways! They are great on their own with butter, with a barbecue or you can make them into little sandwiches. They just could be turning up at our dinner table on repeat throughout the summer.

Here are some Other Dinner Roll Recipes You Might Like

So I got to send a big thanks out to Handle the Heat for this fantastic recipe. I can’t lie, I was a tad skeptical about putting pineapple juice in bread dough, but it worked great. . And I’d like to add, they are not overly sweet at all. Just a hint of sweetness.
The perfect summer roll.
I hope you enjoyed today’s recipe. And if you like this one, make sure to check back on Wednesday to see the last recipe in this three part series!!!
Have a great Monday and keep on cooking. Cheers friends!
Like what you see today? Don’t forget you can follow on Facebook for daily inspiration or over on Instagram where I sometimes do daily cooking videos for fun! I’m also on Pinterest which is a great place that you can save and share your favourite recipes. As well, if you haven’t yet, Subscribe to the newsletter. You’ll be notified whenever there’s a new recipe! You can do that at the top of the page.

Get the Recipe!
Homemade Hawaiian Dinner Rolls
Ingredients
- 1/2 cup canned pineapple juice room temperature
- 1/2 cup warm milk 100 – 110°F
- 4 tablespoons unsalted butter melted and slightly cooled
- 2 whole eggs lightly beaten
- 3 tablespoons granulated sugar
- 1 1/2 teaspoons fine salt
- 2 1/4 teaspoons 1 packet instant yeast
- 4 1/2 cups bread flour
For Brushing the Rolls
- 1 egg beaten
Instructions
- In a large bowl combine the pineapple juice, milk, melted butter, eggs, sugar, salt and yeast. Stir well to combine.
- Add half of the flour to the wet mixture and stir until a batter starts to form. Gradually start adding in the remaining flour until a shaggy dough starts to form, it will be quite sticky. You may not need to use all of the flour depending on the humidity of your room. Once it all comes together and you have a sticky dough, you are ready to knead the dough.
- Knead the dough on a lightly floured surface for about 5 – 8 minutes or until it's elastic and bounces back when touched. Cover with a tea towel and leave to rise until it doubles in size, between 1 – 1 – 1/2 hours.
- Punch down the risen dough and form it into a ball again. Cut it into 15 equal parts. Form each part into a round dough ball.
- Place all the dough balls in a lightly greased 13 x 9 inch baking tray. Cover and leave to rise for another 1 – 1 1/2 hours or until they have doubled in size.
- Preheat oven to 375 degrees F/190 C.
- Lightly brush the tops of the uncooked rolls with a beaten egg. Bake for 15 – 20 minutes or until golden and cooked through.
- Remove from oven and brush with melted butter if desired.
- Pull apart and serve.
*A note on times provided: appliances vary, any prep and/or cook times provided are estimates only.
Notes
Thanks For Stopping by and Hope to see you soon!

